Embarking on a DIY fence installation in New Bedford, Massachusetts? Whether enhancing your home’s privacy or bolstering security against the coastal winds, this guide equips you with essential insights for a successful project. We’ll navigate through understanding local regulations, selecting robust fencing materials suited to our region’s climate, and designing an optimized layout for both privacy and protection. With a detailed step-by-step process for marking, digging, and installing posts and rails, followed by attaching panels and gates with precision, your fence will not only stand as a testament to your handiwork but also as a durable boundary that stands up to the elements. Dive into these tips tailored for New Bedford homeowners, ensuring your DIY endeavor culminates in a long-lasting, aesthetically pleasing barrier.
- Understanding Local Regulations Before Starting
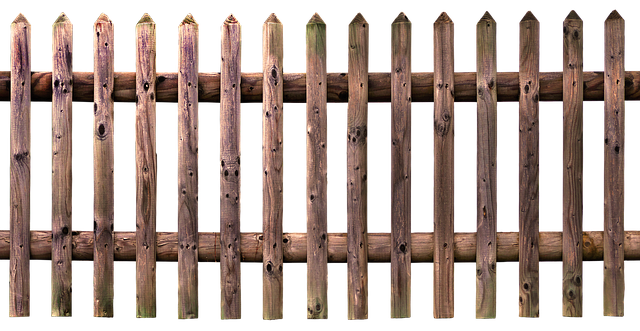
- Choosing the Right Fencing Material for New Bedford's Climate
- Planning Your Fence Layout for Maximum Privacy and Security
- Step-by-Step Guide to Marking and Digging Post Holes
- Selecting and Installing Fencing Posts and Rails Correctly
- Attaching the Fencing Panels and Gates with Precision
Understanding Local Regulations Before Starting
Before embarking on a DIY fence installation in New Bedford, Massachusetts, it is imperative to familiarize yourself with the local regulations governing fence construction. These regulations can encompass a range of requirements from zoning laws that dictate height and placement restrictions, to permits necessary for any construction project. Homeowners must consult the city’s building ordinances to ensure compliance with setback rules and property line specifications. Additionally, awareness of environmental considerations, such as protecting natural habitats or adhering to wetland conservation laws, is crucial. This due diligence not only avoids potential legal issues but also ensures that your fence installation aligns with the community’s aesthetic and functional standards.
A thorough review of the city’s official documentation or a visit to the local zoning office can provide clarity on these matters. It is also advisable to communicate with neighbors about your plans, as their input might influence your design or reveal any pre-existing agreements affecting your property lines. By understanding and adhering to these regulations from the outset, you lay a solid foundation for a successful DIY fence installation project that will stand within the legal frameworks of New Bedford.
Choosing the Right Fencing Material for New Bedford's Climate
When selecting the appropriate fencing material for a home in New Bedford, Massachusetts, it’s crucial to consider the local climate and environmental factors. The maritime climate of New Bedford brings mild, wet winters and warm summers, which means durability and low maintenance should be top priorities when choosing your fence. Wooden fences, a popular choice for their versatility and natural aesthetic, require regular upkeep to withstand rot and decay from prolonged exposure to moisture. Alternatively, composite or vinyl fencing offers a low-maintenance alternative that resists the elements well and comes in various styles to complement your home’s architectural design.
For those looking for a material that offers both strength and longevity, aluminum or steel fences are excellent options. They are highly resistant to corrosion and can be designed to mimic the appearance of wrought iron without the need for constant upkeep. Additionally, chain link fencing provides a cost-effective solution with high durability and ease of installation. Whichever material you choose, ensure it aligns with both your property’s needs and your personal preferences, keeping in mind the specific challenges of New Bedford’s climate to make an informed decision.
Planning Your Fence Layout for Maximum Privacy and Security
When planning your fence layout in New Bedford, Massachusetts, with a focus on privacy and security, careful consideration of your property boundaries, local regulations, and your specific needs is paramount. Begin by accurately measuring your land to determine the optimal placement for posts, ensuring that the fence will encapsulate your property lines effectively. This step not only contributes to securing your space but also sets a solid foundation for a structure that aligns with municipal codes.
In addition to marking out your property lines, evaluate the layout of your surrounding environment, including neighboring properties and any natural landmarks like trees or hills. Orientating your fence panels vertically and maintaining a taller height can help enhance privacy and deter intruders. Additionally, strategically placing gates at locations that are less visible while still providing convenient access to your property further bolsters both privacy and security. Remember to account for the wind direction if you reside in an area prone to strong winds; this can prevent the fence from becoming a sail and potentially toppling over. Lastly, select materials that are robust and have a good reputation for longevity, as these will be more effective in maintaining your privacy and security over time.
Step-by-Step Guide to Marking and Digging Post Holes
When embarking on a DIY fence installation in New Bedford, Massachusetts, accurately marking post holes and safely digging them out is paramount. Begin by measuring and marking your property lines using stakes and string or a garden hose for visibility. Ensure you account for the desired fence height and the depth required to meet local building codes, typically 24 to 30 inches deep. Use a transit or laser level to ensure posts are plumb and align with each other. Once the layout is confirmed, use a post-hole digger or an auger attached to a drill for efficiency. For manual labor, a shovel and wheelbarrow will suffice. When digging, be mindful of underground utility lines; call 811 before you dig to avoid potential damage and service disruptions. After the holes are excavated, check that they are level and at the correct spacing for your fence design. The posts should be securely anchored in concrete once the holes are ready, following a thorough compaction of the soil bottom. Always wear protective gear such as gloves, safety glasses, and ear protection when handling tools and mixing concrete. Adhering to these steps will lay a solid foundation for a durable and compliant fence that will serve New Bedford homeowners well for years to come.
Selecting and Installing Fencing Posts and Rails Correctly
When embarking on a DIY fence installation in New Bedford, Massachusetts, selecting and installing fencing posts and rails correctly is paramount for both functionality and longevity. Begin by assessing your property line to ensure compliance with local regulations and respect for neighbors’ boundaries. Choose rot-resistant wood species like cedar or pressure-treated pine for your posts and rails, which are exposed to New England’s varied weather conditions. Post holes should be dug to a depth of at least one-third the length of the post above ground, with sufficient concrete footing for stability. Use a level and a plumb bob to guarantee vertical alignment as you set the posts in place. For rails, select materials that complement the posts, ensuring they are fastened securely with appropriate hardware, such as galvanized or stainless-steel screws or bolts. Proper spacing between rails is important for both aesthetic appeal and structural integrity; typically, horizontal rails should be placed every 6 to 8 feet. When installing the rails, align them carefully with the tops of the posts to maintain a consistent look. Regularly check that the fence remains plumb as you progress with the installation, making adjustments as necessary to avoid future misalignment or instability. Attaching the fence panels last, complete the installation by securing each panel with screws or nails, ensuring they are positioned at studs for additional support. With careful planning and attention to detail, your DIY fence will serve as a durable boundary for your New Bedford property.
Attaching the Fencing Panels and Gates with Precision
When attaching the fencing panels in New Bedford, Massachusetts, precision is key to achieving a durable and aesthetically pleasing fence. Start by securing the corner posts first, ensuring they are firmly anchored in the ground for a strong foundation. Use a post-hole digger to create holes that are as deep as one-third the height of the fence, and mix concrete in the base of each hole. Position the posts vertically, aligning them with string lines stretched between stakes for accuracy. Allow the concrete to cure according to the manufacturer’s instructions before proceeding. Once the corner posts are set, attach the rails—horizontal members that provide support for the fencing panels—by securing them to both the top and bottom of each post with galvanized screws or nails.
For the fence panels, align the first panel against the corner post, ensuring it is level and flush with the rail. Attach the panel to the rails using ring-shank nails or galvanized screws, driving them at an angle so they are secure yet allow for any future wood movement without splitting. Work your way along the fence line, attaching each subsequent panel in a similar manner, making sure that panels overlap by about one inch to prevent gaps. Measure and cut any panels to fit around gates or irregular spaces with care, maintaining consistent spacing between boards throughout the entire fence for a uniform appearance. When installing gates, hinge them so they open away from boundary lines and ensure they swing smoothly without binding. Use a spirit level to check for plumb on posts and rails at various points during installation to maintain precision and stability in your DIY fence project.